Lebanese Hummus Proper Technique: Silky and Transformative
The secret to restaurant-quality hummus at home: skinned chickpeas, proper tahini blending, and understanding how warmth transforms texture into pure silk.
Wednesday, November 22, 2023/3 min read
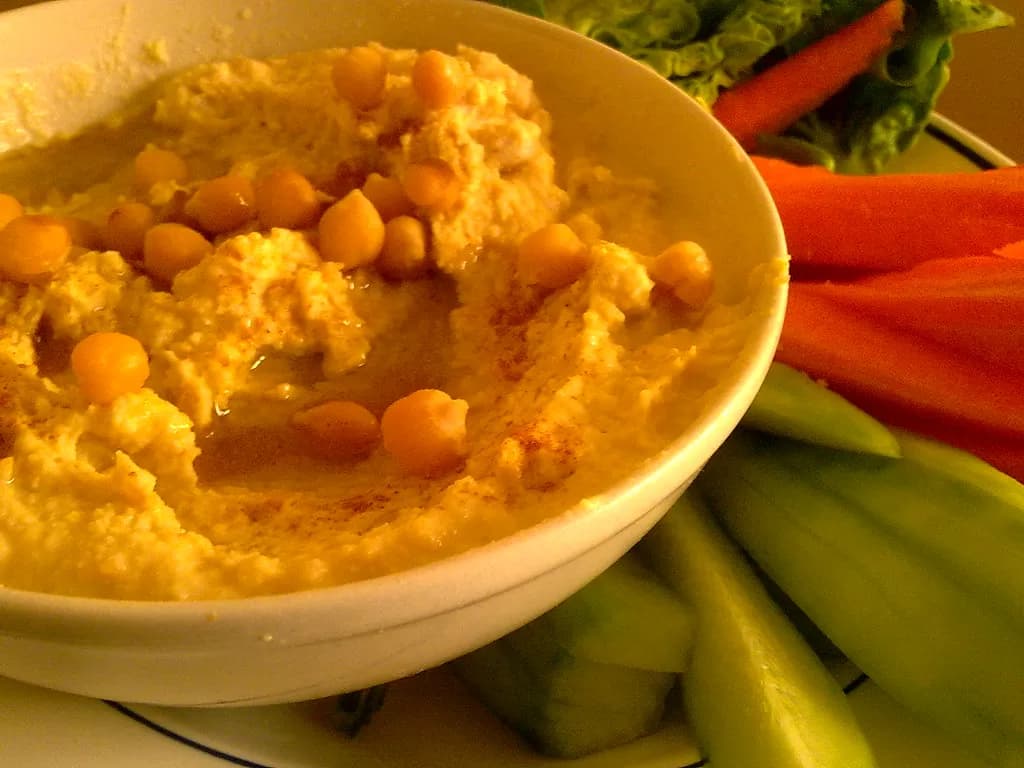
Hummus is not hard to make. Hummus is simple. But proper Lebanese hummus, the kind that tastes like clouds and lemon and sesame all at once, requires something beyond mere mixing: it requires understanding the mechanics of texture and how to coax air into chickpeas and tahini until they surrender into something lighter than they have any right to be. The difference between mediocre hummus and the kind that stops you mid-bite is the thickness of chickpea skins. Yes, skins. Those tiny, translucent shells that separate from the bean's interior during cooking are the difference between grainy and glossy.
Lebanese hummus demands several key techniques: removing chickpea skins, aerating tahini before blending, and using warm chickpeas to achieve that impossibly smooth texture that made hummus famous in the Levant. The tahini itself must be treated almost ceremonially. Quality tahini from Lebanese or Palestinian brands like Al Wadi, Soom, or Cortas, should be light in color with a nutty, mildly bitter flavor and pour easily. When most of the tahini you find in supermarkets is thin enough to funnel, you know immediately that authentic Lebanese hummus begins with sourcing.
The Lebanese palate accepts only one clove of garlic in their hummus, just enough to whisper through the background rather than announce itself. The lemon is bright, significant, balancing the earthiness of tahini with sharp acidity. It is the restraint that makes Lebanese hummus distinct from heavier, garlickier versions found elsewhere in the Mediterranean. Each spoonful should taste like the platonic ideal of all three elements in perfect equilibrium.
Ingredients
Serves 4 to 6 as part of a mezze. Active time: 20 minutes plus 30 minutes for chickpea skin removal. Total time: 50 minutes.
- 400 g canned chickpeas, drained and liquid reserved
- 100 g tahini (from a good quality brand)
- 3 tablespoons fresh lemon juice (about one large lemon)
- 1 clove garlic, minced
- 60 ml ice water
- 5 ml olive oil
- 0.5 teaspoon salt, or to taste
- Pinch of paprika for garnish (optional)
- Pinch of sumac for garnish (optional)
Method
- Rinse the drained chickpeas under cool water in a fine-mesh sieve. Gently rub them between your palms or in a kitchen towel, working in batches. The thin skins will slip off into the water. This step takes patience (10 to 15 minutes for the full batch), but the difference in final texture is worth every moment. Discard as many skins as you can capture.
- If skins prove stubborn, soak the chickpeas in warm water with 0.5 teaspoon of baking soda for 10 minutes, then drain and repeat the rubbing process. Many skins will slip away more easily.
- Pat the peeled chickpeas dry and set aside at room temperature.
- Place the tahini, lemon juice, minced garlic, and salt into the bowl of a food processor. Blend for 90 seconds on high speed. This initial blend should produce a thick, pale mixture as the tahini aerates and the acids from the lemon begin to break down the sesame. Do not skip this step. The aeration is crucial to the final texture.
- With the processor running, slowly drizzle in the ice water through the feed tube. The mixture will become slightly thinner and lighter. This transformation is exactly what you want.
- Add the peeled chickpeas gradually while the processor is running, starting with half of them. Blend for 3 to 5 minutes on high, until completely smooth. The warmth of the chickpeas and the friction from the blender blades will create heat that helps them blend into silk.
- Taste and adjust: add more lemon juice for brightness, salt to taste, or a touch more water if you prefer it thinner. The final hummus should be light, airy, and spoon easily.
- Transfer to a serving bowl and create a shallow well in the center with the back of a spoon. Drizzle with olive oil and garnish with a pinch of paprika or sumac if desired.
Storage and Make-Ahead
Hummus keeps in the refrigerator for up to 4 days in an airtight container. The flavors actually improve slightly after the first day as they meld. Before serving leftovers, bring to room temperature and drizzle with fresh olive oil, which restores the silky quality. If hummus becomes too thick in the refrigerator, thin it gently by folding in a little water or olive oil by hand, never by reblending, which can make it gluey. You can also make hummus up to two days ahead for entertaining, ensuring it sits at room temperature for at least 30 minutes before serving for optimal flavor and texture.
Understanding proper hummus technique transforms it from a store-bought approximation into something that tastes like the Mediterranean itself captured in a bowl.
Published in The Outspoken Digest
Editorial desk
Outspoken Digest Food DeskCooking, ingredients, restaurants and the economics of what ends up on the table.
Newsletter
The Digest, in your inbox
One edition, sent when it is ready. No noise, and your address is never passed on.
Read Next
More Recipes →
Swangy Tamarind Glazed Chicken Wings for the Flavour Replacing Swicy on Fast Food Menus
Sep 29, 2026/3 min read

Baked Apple Cider Doughnuts for a Cider Season That Peaked Earlier Than the Calendar Says
Sep 29, 2026/3 min read
An Obatzda Bavarian Beer Cheese Dip for the Final Stretch of Oktoberfest 2026
Sep 29, 2026/3 min read