A Gluten-Free Sourdough Loaf That Is Actually Bread
Wild fermentation does something for gluten-free bread that yeast cannot: flavour, a softer crumb, and a loaf that keeps. It takes five days to start and about twenty minutes of work a day after that.
Tuesday, August 11, 2026/3 min read
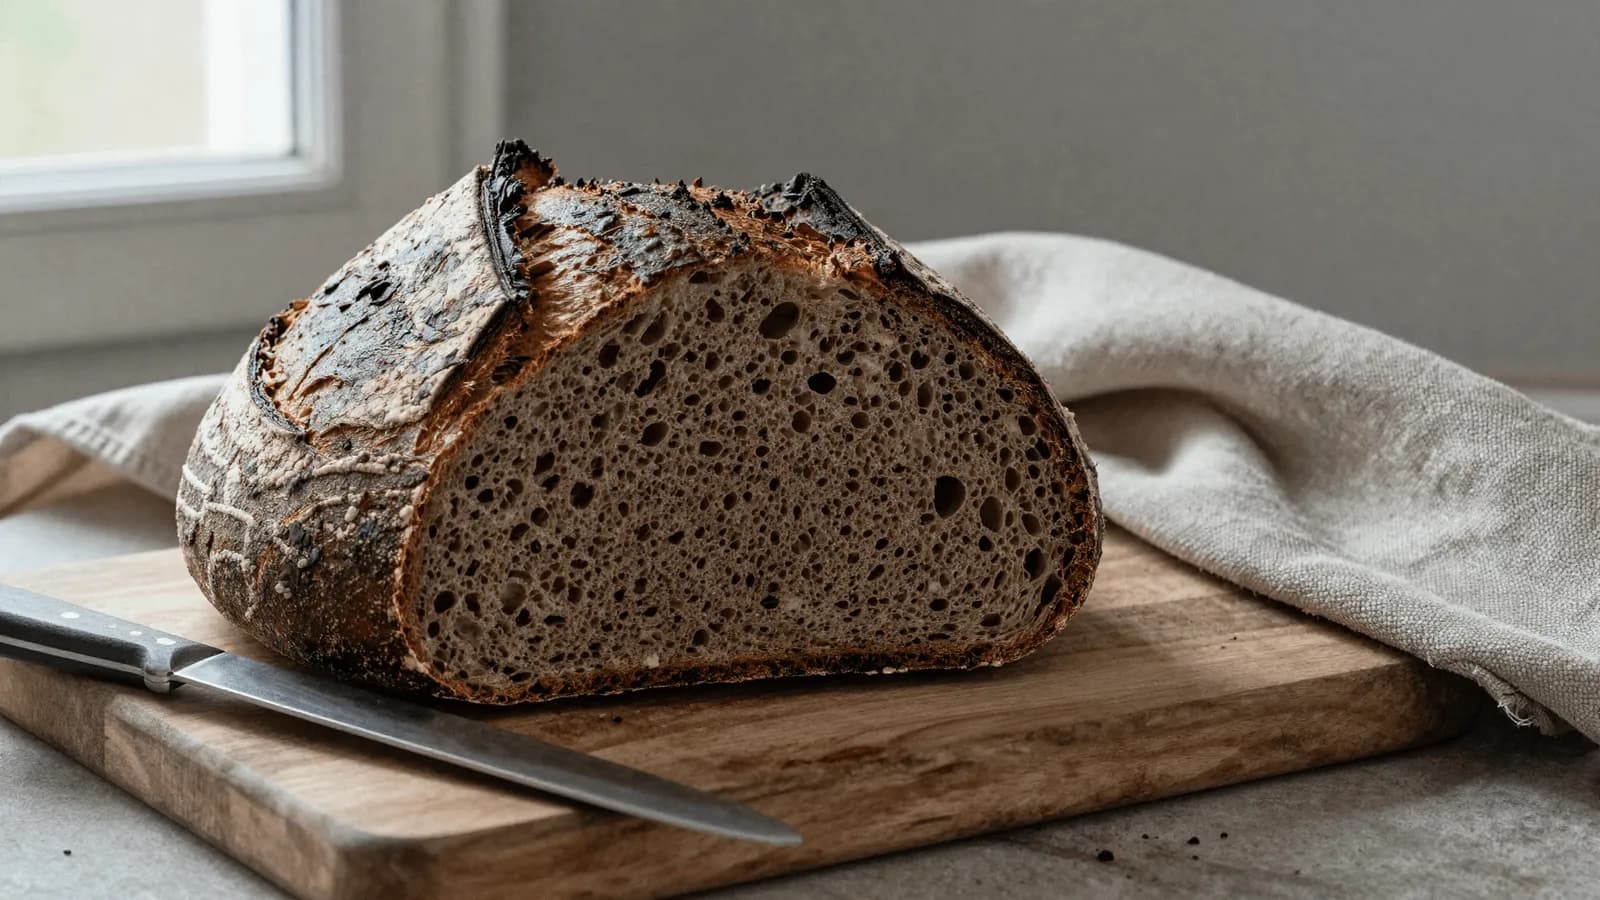
Gluten-free bread has an honesty problem. Most of it is a starch cake with yeast in it: pale, sweetish, dry by the afternoon and stale by the next morning.
Sourdough fixes more of that than people expect. The long fermentation develops acids that make the crumb softer and slow staling, breaks down some of the starch that otherwise tastes flat, and gives the loaf actual flavour rather than the faint sweetness that plagues commercial gluten-free bread.
What it cannot do is give you gluten. The structure still has to come from psyllium. Fermentation supplies the taste and the keeping quality.
The starter, five days
Use brown rice flour or buckwheat flour. Buckwheat ferments faster and more reliably, which is why it is the better choice for a first attempt.
- Day 1. Mix 50 g buckwheat flour with 50 g water in a jar. Cover loosely.
- Days 2 to 5. Each day discard half and feed with 50 g flour and 50 g water.
By day four or five it should smell sour and fruity rather than sharp, and roughly double within six hours of feeding. In a warm kitchen this happens faster. In an air-conditioned one it takes longer, so find a warmer corner.
Gluten-free starters are wetter and less dramatic than wheat ones. Do not expect the same rise. Bubbles throughout and a clean sour smell are the signal.
Ingredients for the loaf
- 100 g active starter
- 25 g whole psyllium husk
- 420 ml warm water
- 150 g buckwheat flour
- 150 g brown rice flour
- 100 g tapioca starch
- 50 g sorghum or millet flour
- 10 g salt
- 1 tablespoon honey or maple syrup
- 2 tablespoons olive oil
Method
1. Gel the psyllium
Whisk the psyllium into the warm water and leave five minutes, until it thickens into a loose jelly. Add the starter, the honey and the oil, and whisk again.
Never add psyllium dry to the flours. It clumps and the lumps never hydrate, which produces a loaf with slippery pockets in it.
2. Mix
Combine the flours and salt in a bowl, add the psyllium mixture, and mix with a spatula until no dry flour remains. It will be a thick, sticky paste rather than a dough. That is correct.
Do not knead. There is no gluten to develop and working it does nothing but warm it up.
3. Bulk ferment
Cover and leave at room temperature for four to six hours. It should puff visibly, perhaps by half again, and show bubbles at the edges of the bowl.
This is slower than wheat sourdough and less visually rewarding. Judge it by time and bubbles, not by doubling.
4. Shape and prove cold
Scrape onto a wet surface, shape into a round with wet hands, and place seam side up in a banneton lined with a floured cloth. Refrigerate overnight, eight to twelve hours.
The cold prove is what makes the loaf sliceable. Skip it and you get a gummy interior.
5. Bake in a covered pot
Heat the oven to 230C with a Dutch oven inside for at least 30 minutes. Turn the loaf onto baking paper, score it once, deeply, and lower it in.
Bake covered for 40 minutes, then uncovered for 20 to 25 minutes until dark. Gluten-free loaves need a longer bake than wheat and are usually underbaked, which is where the gumminess comes from. The internal temperature should be above 96C.
6. Wait
Cool completely before cutting. At least four hours, ideally overnight. This is the hardest instruction in the recipe and the least optional, because the crumb is still setting as it cools and cutting it hot gives you paste.
Notes
It keeps three to four days cut side down on a board, and slices freeze well. Toasting improves it from day two onward.
The starter lives in the fridge and needs feeding once a week. If you have been keeping a wheat starter, you cannot convert it, because the flour it was raised on stays in the mix. Start a new one.
Every flour blend absorbs differently, so treat the water quantity as a starting point. The paste should be thick but pourable, not stiff. Our guide to what each gluten-free flour does explains why substituting one for another changes the hydration.
Cross-contamination
If you have coeliac disease, use certified flours, and be aware that a kitchen that also bakes with wheat carries real risk from airborne flour, shared boards and the toaster. The reasoning is in our piece on coeliac disease versus gluten sensitivity, and it is why the answer to how careful you need to be depends on which one you have.
Published in The Outspoken Digest
Editorial desk
Outspoken Digest Food DeskCooking, ingredients, restaurants and the economics of what ends up on the table.
Newsletter
The Digest, in your inbox
One edition, sent when it is ready. No noise, and your address is never passed on.
Read Next
More Recipes →
Swangy Tamarind Glazed Chicken Wings for the Flavour Replacing Swicy on Fast Food Menus
Sep 29, 2026/3 min read
Baked Apple Cider Doughnuts for a Cider Season That Peaked Earlier Than the Calendar Says
Sep 29, 2026/3 min read
An Obatzda Bavarian Beer Cheese Dip for the Final Stretch of Oktoberfest 2026
Sep 29, 2026/3 min read