The Manakish Dough, and Why Yours Comes Out Like a Cracker
A soft, oil-enriched bread dough that stays tender under a hot oven. The hydration and the resting matter more than the recipe, and both are where home versions go wrong.
Thursday, August 13, 2026/5 min read
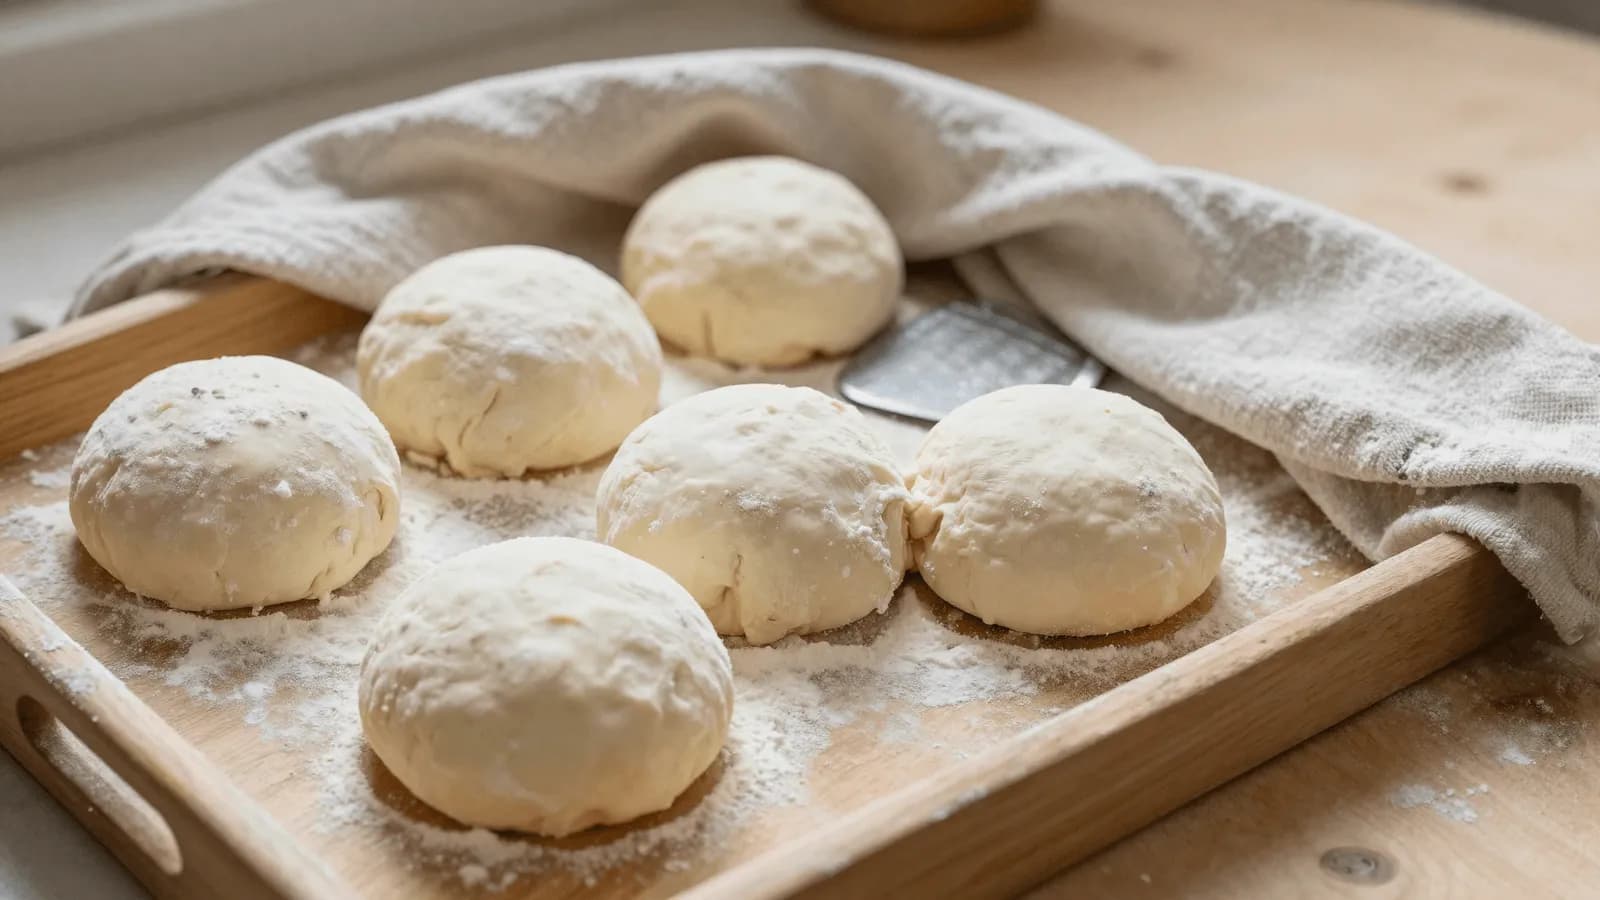
Almost every complaint about homemade manakish is really a complaint about the dough. The topping is two ingredients stirred in a bowl and is very hard to get wrong. The bread underneath is where the disappointment lives.
The failure mode is consistent: it comes out thin, hard and snappy, more cracker than bread, and it goes stale within the hour. That is a hydration and handling problem, and it is entirely fixable.
What kind of dough this actually is
Manakish dough sits between a pizza dough and a soft pita. It is leaner than a brioche and richer than a baguette, and the olive oil in it is doing structural work rather than flavour work.
Fat shortens gluten strands. In a bread you want chewy, that is a problem. In a flatbread that has to stay foldable while still warm and pliable in a paper bag twenty minutes later, it is the entire point. Take the oil out and you get something closer to a Turkish pide base, which is a fine bread and the wrong one here.
The second variable is water. Anything under about 60 per cent hydration gives a dough that is easy to roll and disappointing to eat. Around 64 per cent is the working figure and it will feel slightly tackier than you expect.
Ingredients
Makes enough for 6 flatbreads, about 20 cm across. Around 2 hours, or overnight.
- 500 g plain white flour (roughly 10 to 11 per cent protein)
- 320 ml warm water
- 7 g instant dried yeast
- 1 teaspoon sugar
- 1.5 teaspoons fine salt
- 3 tablespoons olive oil
- 1 tablespoon plain yogurt (optional, for a softer crumb)
Strong bread flour is not an improvement here. High protein gives a chewier, more elastic dough that fights the rolling pin and springs back thick. Ordinary plain flour is the right choice, which is convenient.
Method
1. Wake the yeast
Stir the yeast and sugar into the warm water and leave it five minutes until it foams at the edges. Water at blood heat is right; hot water kills yeast and cold water simply delays everything.
2. Mix, then wait before kneading
Combine flour and salt, add the yeast water, the oil and the yogurt if using, and stir to a rough shaggy mass with no dry flour left. Now cover it and walk away for 20 minutes.
This rest is an autolyse, and it does a meaningful share of the kneading for you: the flour hydrates fully and gluten begins forming on its own. Twenty idle minutes will save you five minutes of work and give a noticeably more extensible dough.
3. Knead until it stops tearing
Knead for six to eight minutes. The dough should go from ragged to smooth and should stretch thin without tearing straight away. It will stay a little tacky and that is correct.
Resist adding flour to make it comfortable to handle. Every extra spoonful is hydration removed, and hydration is what you are trying to protect. Oil your hands instead of flouring the bench.
4. Rise, warm or cold
For the same day, oil the bowl, cover, and leave it 90 minutes until doubled. For better bread, put it straight in the fridge overnight and pull it out an hour before shaping.
A cold, slow fermentation develops flavour that a fast warm rise never reaches, and the dough is easier to shape cold. If you can plan a day ahead, do this.
5. Divide and rest again
Divide into six pieces, roll each into a tight ball under a cupped hand, and rest them covered for at least 15 minutes.
This is the step people skip and it is not optional. A freshly balled dough is tense; it will shrink back the moment you roll it, and you will fight it thinner and thinner until you have compressed all the air out. Rested dough rolls out and stays there.
6. Shape without a rolling pin if you can
Press each ball out with the heel of your hand into a disc about 20 cm across and half a centimetre thick, then dimple the surface all over with your fingertips.
A rolling pin degasses the dough and gives a flatter, denser result. Hands leave more of the structure intact. If the dough resists, it needs another five minutes of rest, not more force.
Why does manakish dough turn out hard?
Three causes, in order of frequency. Too little water, usually because flour was added during kneading to stop it sticking. Too little rest before shaping, so the dough was forced thin and lost its gas. And an oven that was not hot enough, which dries the crumb out before the surface has coloured. Fix the hydration first; it is responsible for most of it.
Can you make manakish dough ahead of time?
Yes, and it is better for it. The dough keeps in the fridge for up to 48 hours after mixing and improves over the first 24. You can also freeze it: shape the balls, freeze them on a tray, then bag them. Thaw in the fridge overnight and rest at room temperature for an hour before shaping. Shaped, topped and frozen raw also works, baked from frozen with two extra minutes.
What flour is best for manakish?
Ordinary plain or all-purpose flour, around 10 to 11 per cent protein. Bread flour makes the dough elastic and springy, which sounds desirable and is not: it resists shaping and bakes up chewier than a flatbread should be. Some bakeries cut in a small proportion of fine semolina for a slightly sandy bite, which is worth trying at about 10 per cent of the flour weight once you have the basic version working.
Where the dough goes next
This same dough covers the whole family. Za'atar and oil gives you the classic, set out in full in the manakish za'atar recipe. Akkawi cheese gives you the other half of every Levantine bakery counter, in the cheese version. Minced lamb with tomato and onion pushes it towards sfiha, though those are shaped smaller and thicker.
If you need it gluten free, the structure has to change rather than the ingredients being swapped one for one, and we set that out separately in the gluten-free za'atar flatbread.
Make it twice in a week and the feel of the correct dough will stop being a number and start being something your hands recognise, which is the only way any bread recipe is ever really learned.
Published in The Outspoken Digest
Editorial desk
Outspoken Digest Food DeskCooking, ingredients, restaurants and the economics of what ends up on the table.
Newsletter
The Digest, in your inbox
One edition, sent when it is ready. No noise, and your address is never passed on.
Read Next
More Recipes →
Swangy Tamarind Glazed Chicken Wings for the Flavour Replacing Swicy on Fast Food Menus
Sep 29, 2026/3 min read

Baked Apple Cider Doughnuts for a Cider Season That Peaked Earlier Than the Calendar Says
Sep 29, 2026/3 min read
An Obatzda Bavarian Beer Cheese Dip for the Final Stretch of Oktoberfest 2026
Sep 29, 2026/3 min read